Let’s be honest — nobody enjoys filling out long registration forms or trying to remember yet another password.
In fact, 68% of users abandon the login process because they forget their passwords. On top of that,
75% of users say they want changes to how they log in because managing passwords has become a major headache.
If you’re managing a WordPress site, these numbers should send a strong warning. A difficult login or signup process will drive visitors away before they engage with your content or services.
That’s where Facebook Login becomes powerful.
In this article, we’ll walk you through how to integrate Facebook Login into your WordPress site using a login plugin—step by step.
Ready? Let’s get started!
Please note: For this guide, we will utilize the All in One Login plugin to add the Facebook Login option to a WordPress website. Later in the article, we will discuss the plugin in more detail.
Why Add Facebook Login to Your WordPress Site?
Think about the last time you abandoned a signup form because it felt like too much work — name, email, password, confirm password, agree to terms, verify email, etc. It’s exhausting, right? Your visitors feel the same way.
That’s why adding Facebook Login isn’t just a convenience; it’s a brilliant conversion strategy.
As of today, over 397,809 live websites use Facebook Login to let users log in with their already established accounts. With more than 3 billion monthly active users on Facebook, it’s one of the biggest networks you can leverage for smooth user onboarding.
It simplifies the login process, reduces friction, and keeps users engaged instead of frustrated.
Here’s why it matters:
- Faster Logins Mean Happier Visitors: People expect speed. With Facebook Login, your users can sign in with just one click, no typing, no verification emails, and no wasted time. According to auth0, websites that offer social login options experience up to 20% higher sign-up conversion rates.
- Increased Return Visits and Engagement: When logging in is easy, people are more likely to come back. A friction-free experience keeps visitors connected to your site, whether they’re reading content, shopping, or accessing membership pages.
- More Accurate User Data: Since Facebook provides verified details like name and email address, you get real, reliable user data, not fake accounts or invalid emails. That improves your communication and reduces bounce rates from undeliverable messages.
- Better Security with Trusted Authentication: Facebook Login uses OAuth 2.0, a secure protocol that handles authentication on Meta’s side. This adds a layer of protection because you’re not storing passwords directly on your WordPress site.
- Reduced Password Fatigue: The average internet user has around 170 passwords to manage. No wonder they forget them. Letting visitors log in with Facebook removes that headache and keeps them active on your site.
In short, Facebook Login is about saving time and keeping users engaged. And with the AIO Login Pro plugin, you can add this feature to your WordPress site without touching a single line of code.
Prerequisites Before You Start
Before diving into the setup, let’s make sure you have everything ready. Integrating Facebook Login into WordPress is straightforward, but a few essentials will save you time and confusion later.
Here’s what you’ll need:
- WordPress site with admin access.
- All In One Login free and pro versions installed and activated.
- Meta (Facebook) Developer account to get your App ID & App Secret.
- Redirect URL that the plugin will generate for you during setup.
💡 If you haven’t installed All In One Login yet, you can quickly set it up by following the installation guide. Once everything above is in place, you’re ready to start integrating Facebook Login step by step.
4 Easy Steps to Add Facebook Login to WordPress
This easy four-step process is all you need to allow your users the convenience of one-tap login with their favorite social media.
Step 1: Install All In One Login (Free + Pro) and Enable Facebook Login
The Facebook Social Login is the premium feature of All In One Login, but the premium version of the plugin depends on the free version.
Follow the steps below to install both (free and pro versions):
- Log in to your WordPress dashboard and go to Plugins → Add Plugin.
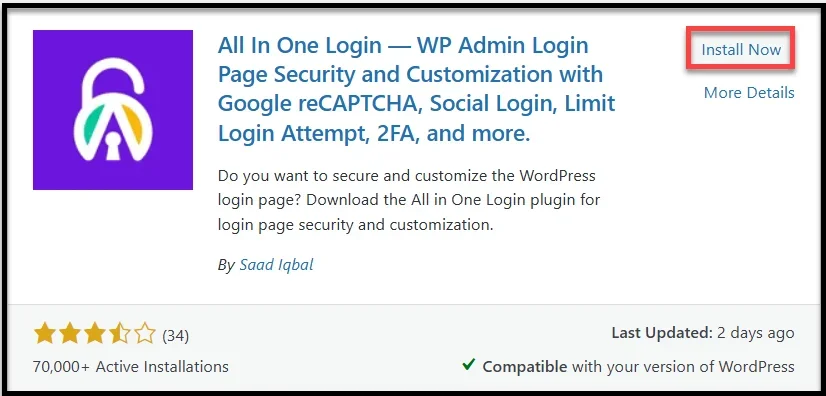
- Search for “All In One Login” and find the one by Saad Iqbal.
- Click Install Now, then Activate.
- After activation, click the opt-in option and you’ll be redirected to the AIO Login dashboard.

✅ That’s it—the free version is installed. Next, you’ll add the Pro version for Facebook Login and other premium features.
- Go to the official website of the plugin and get any premium plan of your choice.
- After purchasing the premium plan, you’ll receive the welcome email with the zip file and license key.
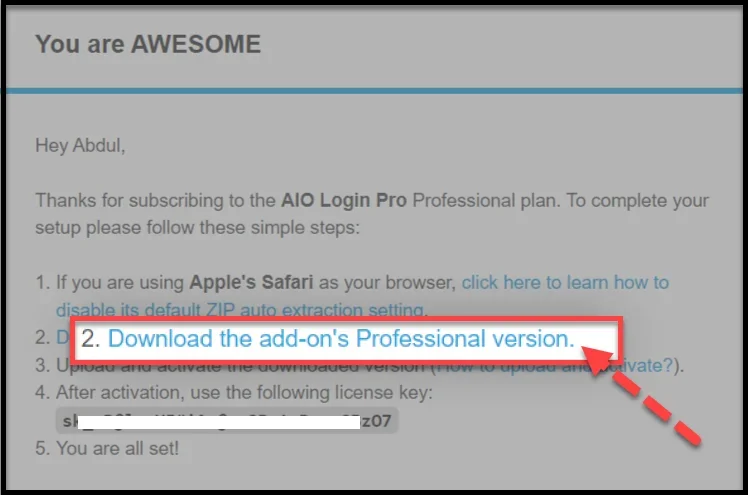
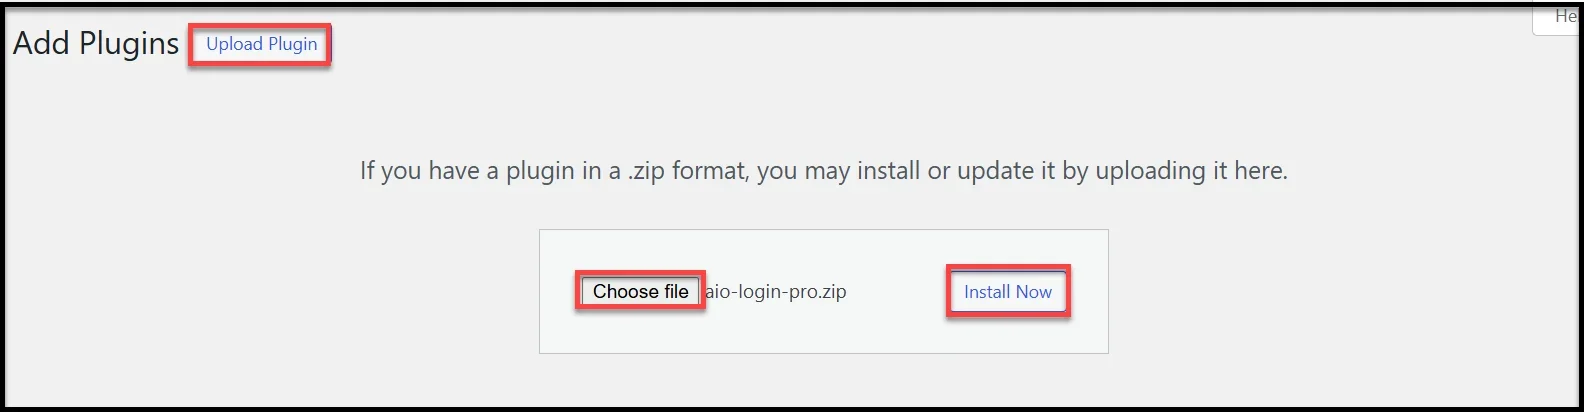
- Download the zip file from the welcome email, and in your WordPress dashboard, go to Plugins → Add Plugin → Upload Plugin, upload the .zip file, and click Install Now.
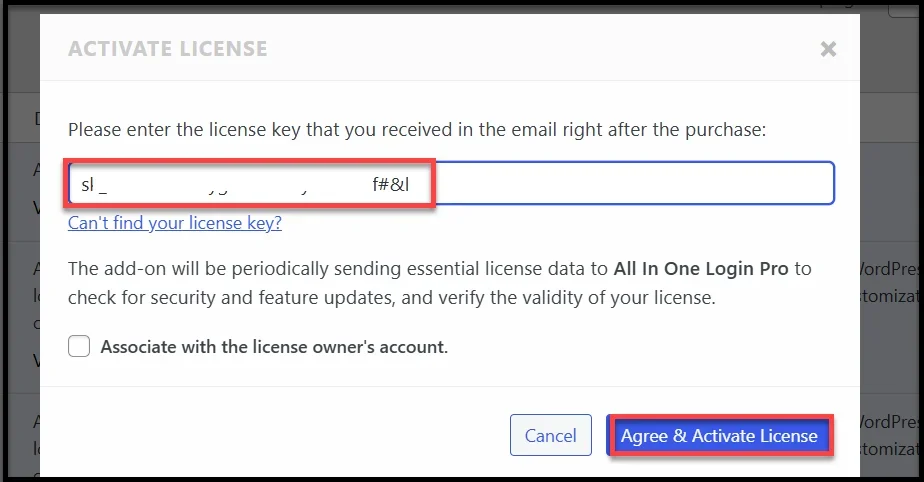
- After installing, click “Activate Plugin” and you’ll be asked to enter your license key. Copy it from the welcome email, paste it in the respective field, and click ‘Agree & Activate License.’
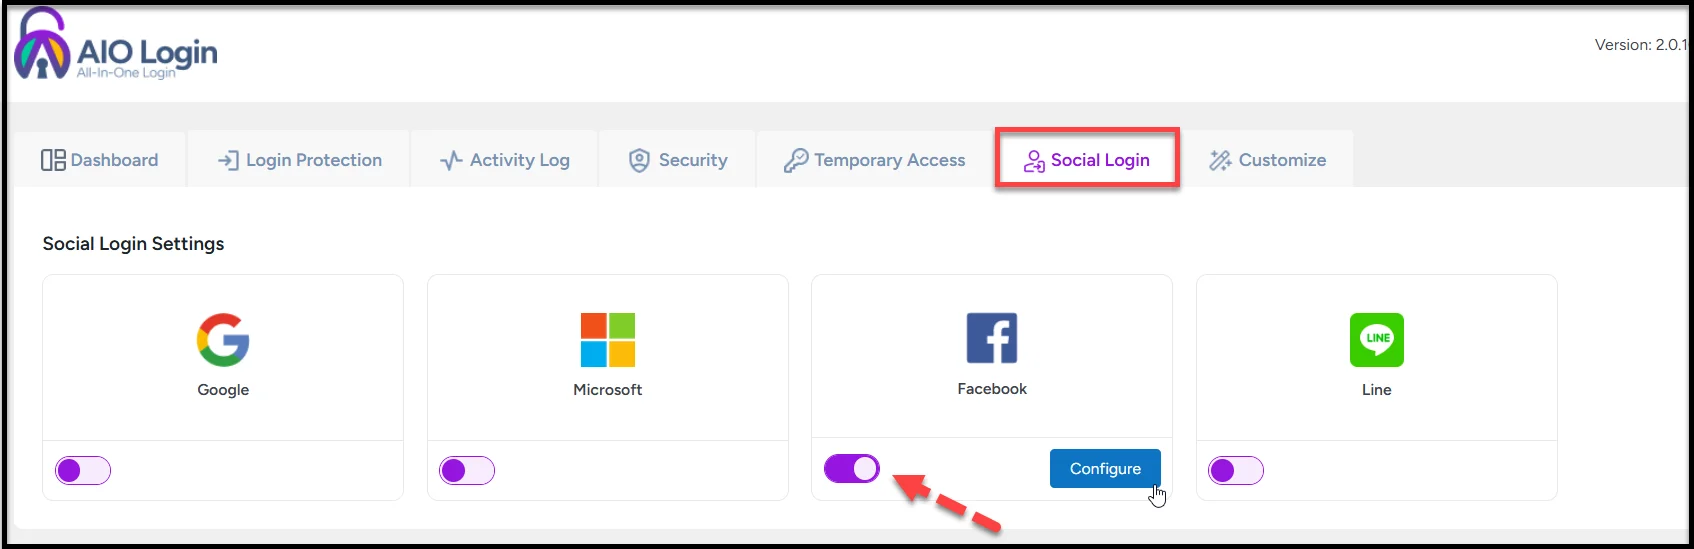
- Once activated, open the AIO Login → Social Login tab to access all the social login options, such as:
- Microsoft
- LINE
- Toggle on the Facebook social login option and click ‘Configure.’
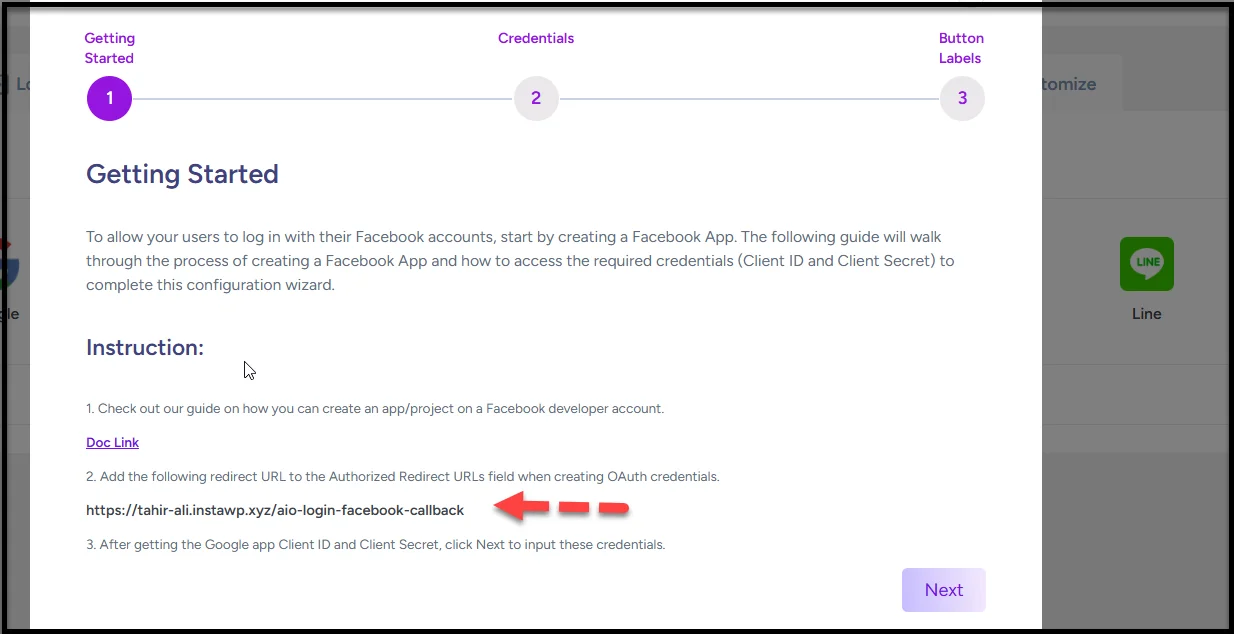
- You’ll see the pop-up with the three-step Facebook login setup process. Copy the Redirect URL, and hit Next.
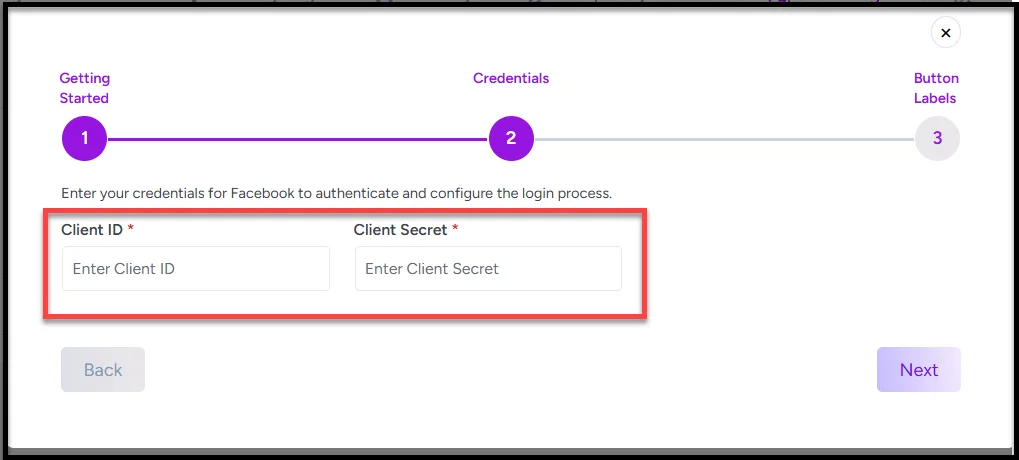
- Here you’ll see that you need the Client ID and Client Secret. We will get them by creating the Facebook App in step number two.
Step 2: Create a Facebook App and Get Your App ID & App Secret
To let users log in with Facebook, you’ll first need to create a Facebook App. This app connects your WordPress site with Facebook’s authentication system.
To create the Facebook app, follow the steps below:
- Visit Meta for Developers’ official website, and log in with your Facebook account or create a new account.
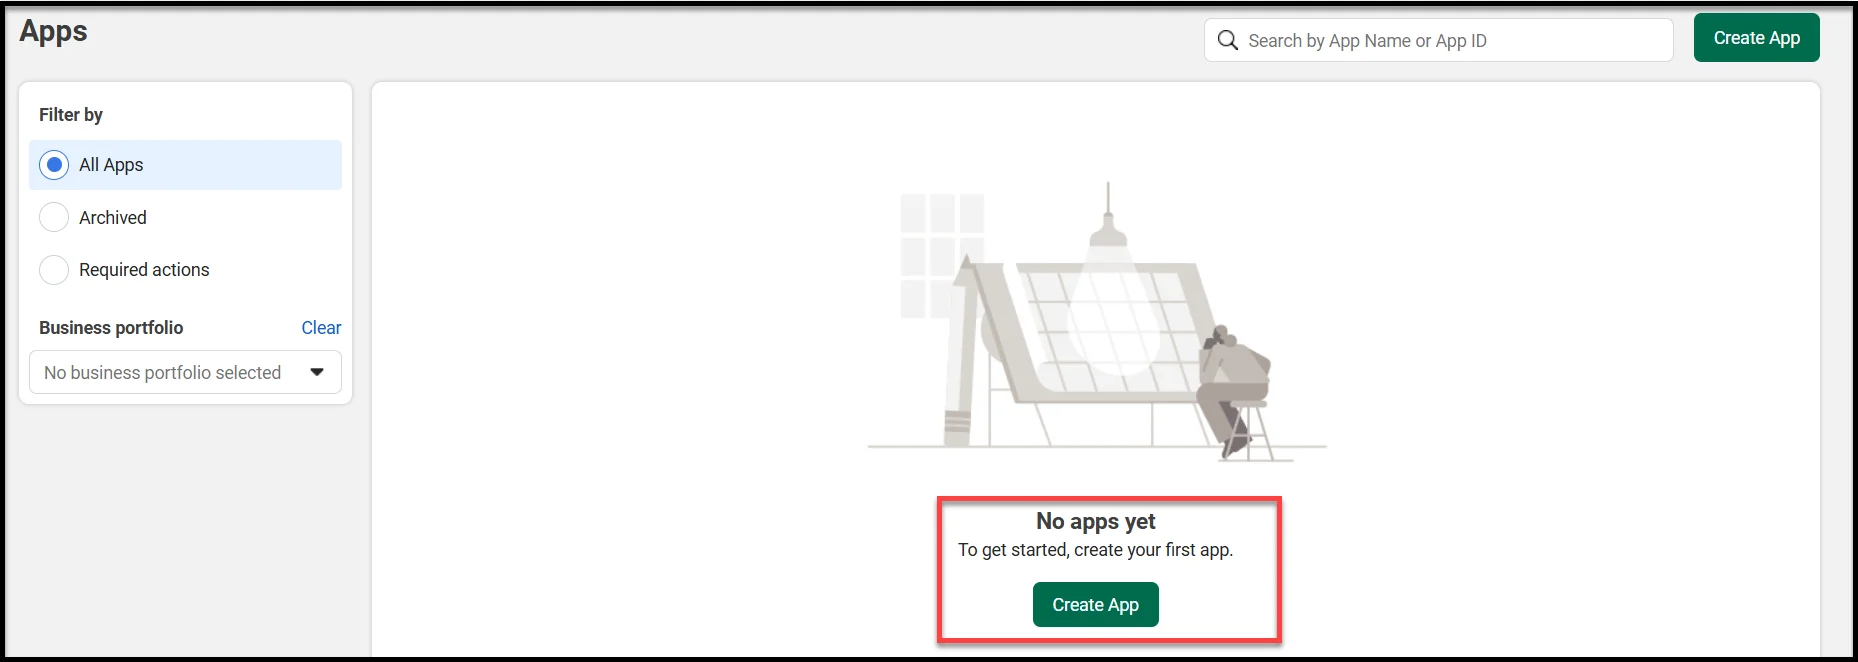
- Click My Apps → Create App.
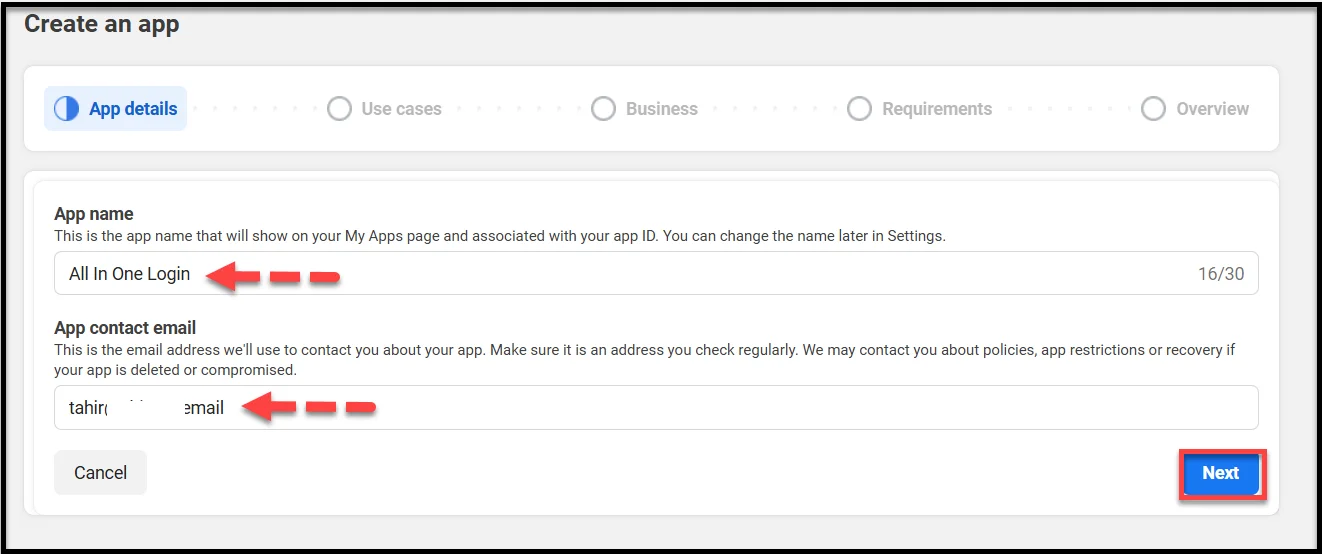
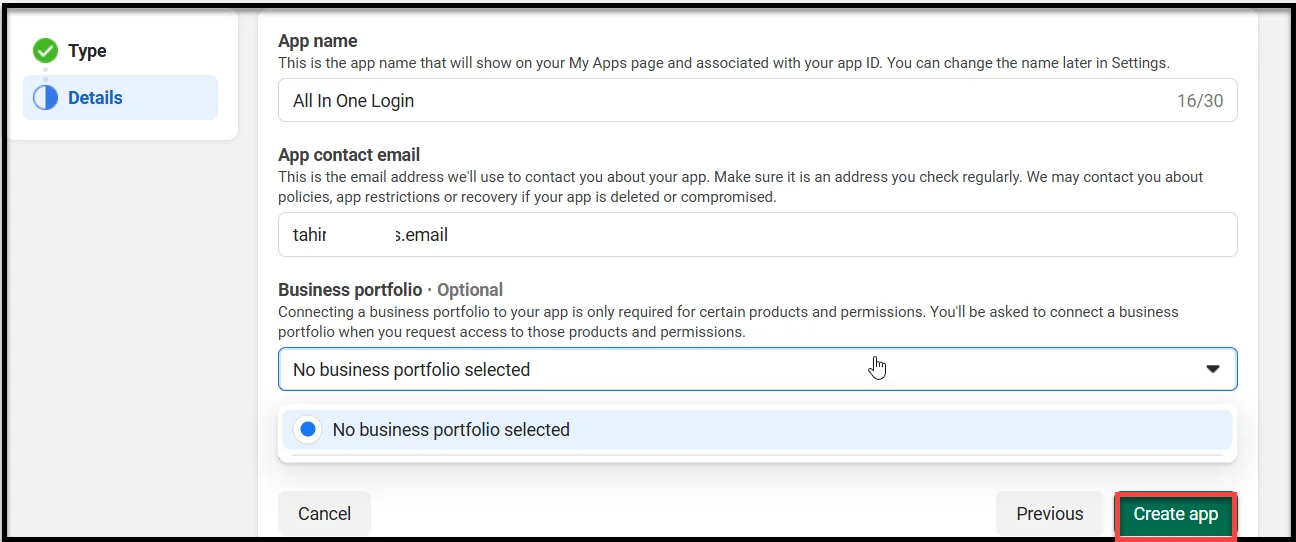
- Provide app details (App name and App contact email), and hit Next.
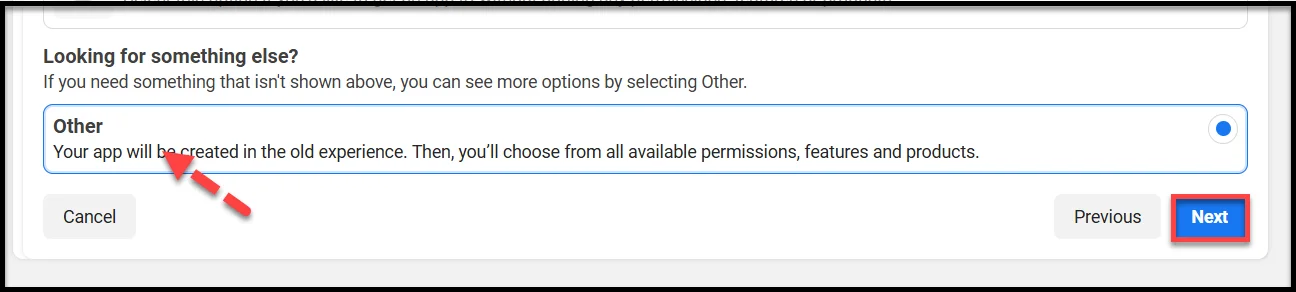
- For Use cases, scroll down and select ‘Other’ and hit Next.
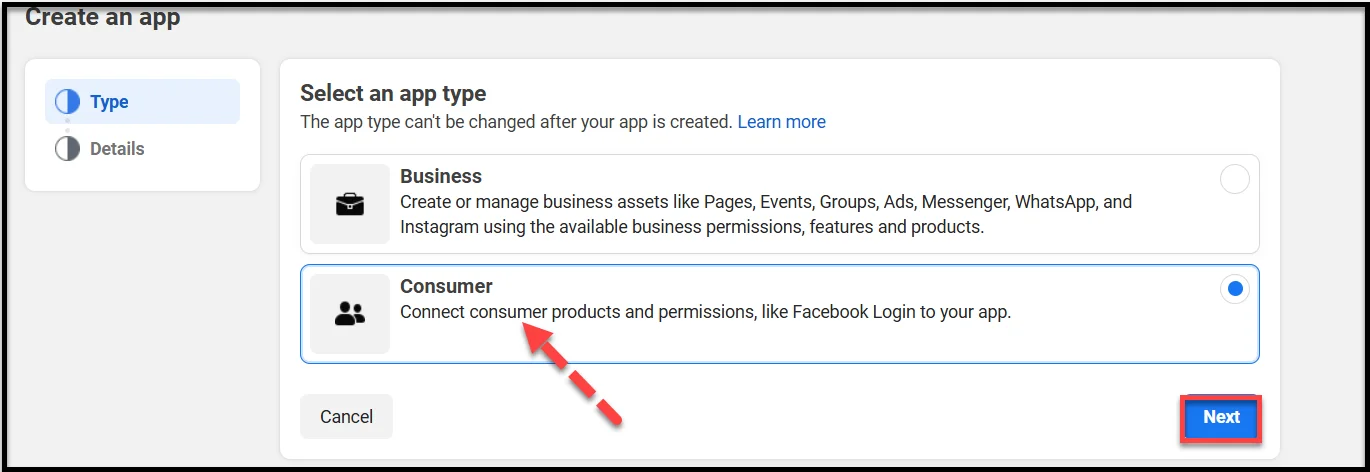
- On the subsequent screen, choose Consumer as the app type and click Next.
- If your app needs specific products or permissions, you should link a business portfolio; otherwise, select ‘No business portfolio selected’ to continue without connecting one and hit ‘Create app.’
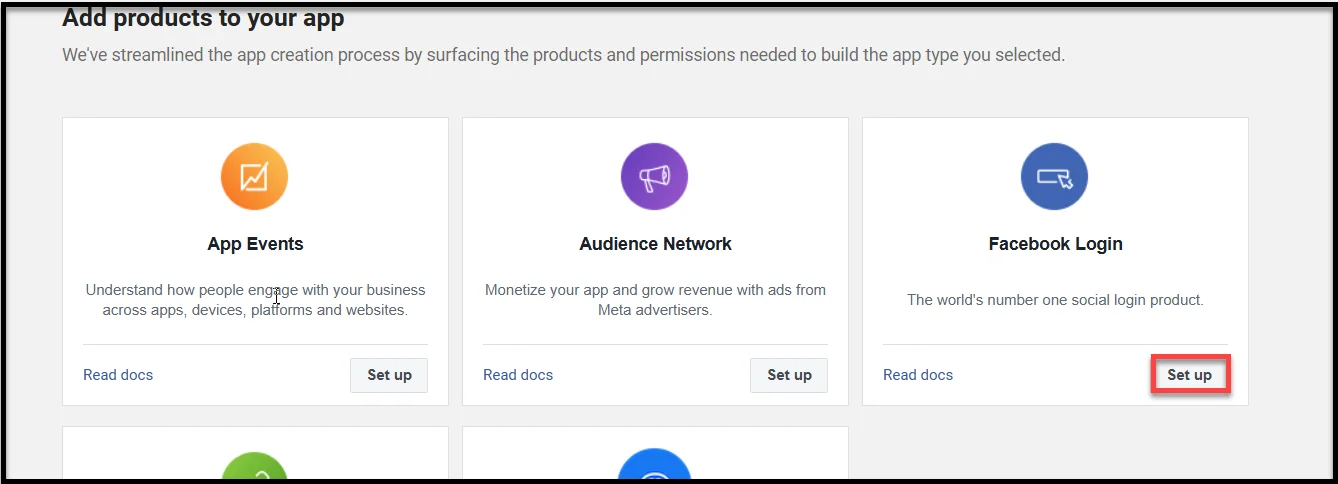
- Under the Facebook Login product in the app dashboard, click ‘Set up.’
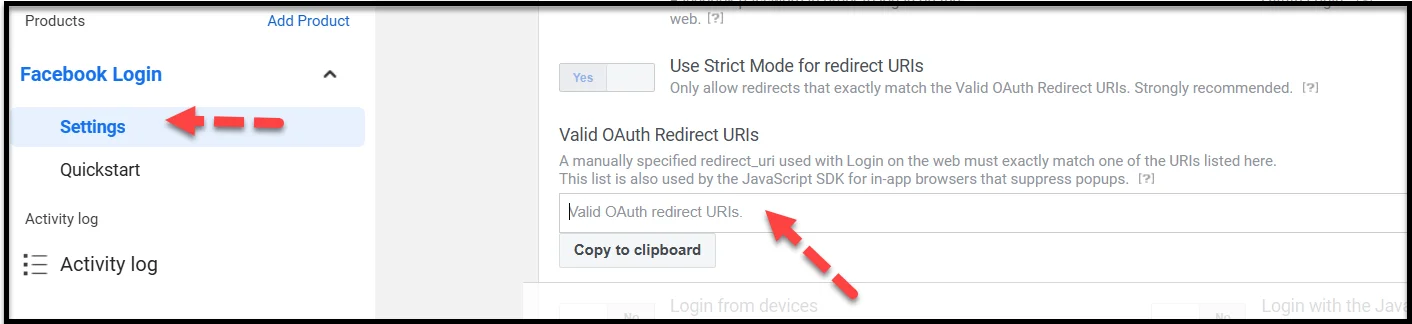
- Now, from the sidebar, click Settings and look for ‘Valid OAuth Redirect URIs,’ paste the Redirect URL you have copied in the end of step number one and hit Save Changes.
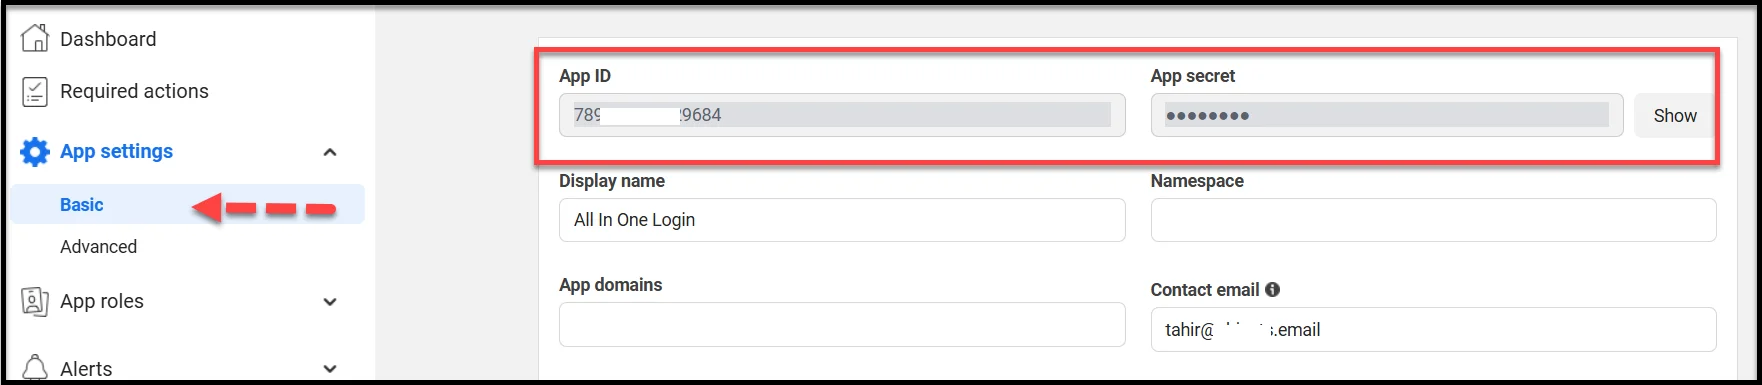
- Now, from the sidebar, go to App settings → Basic. Copy App ID and App secret.
Step 3: Connect the Facebook App to WordPress
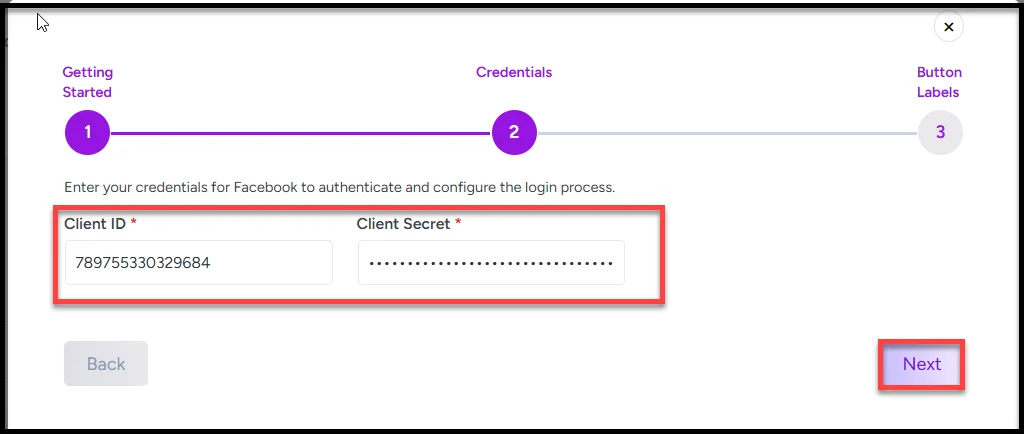
- Go back to your WordPress dashboard and open AIO Login → Social Login → Facebook Configuration. Hit Next.
- Now, paste your App ID and App Secret that you copied after creating the Facebook App, and click Next.
- You can also personalize the Login/Logout button text to match your site’s style or branding.
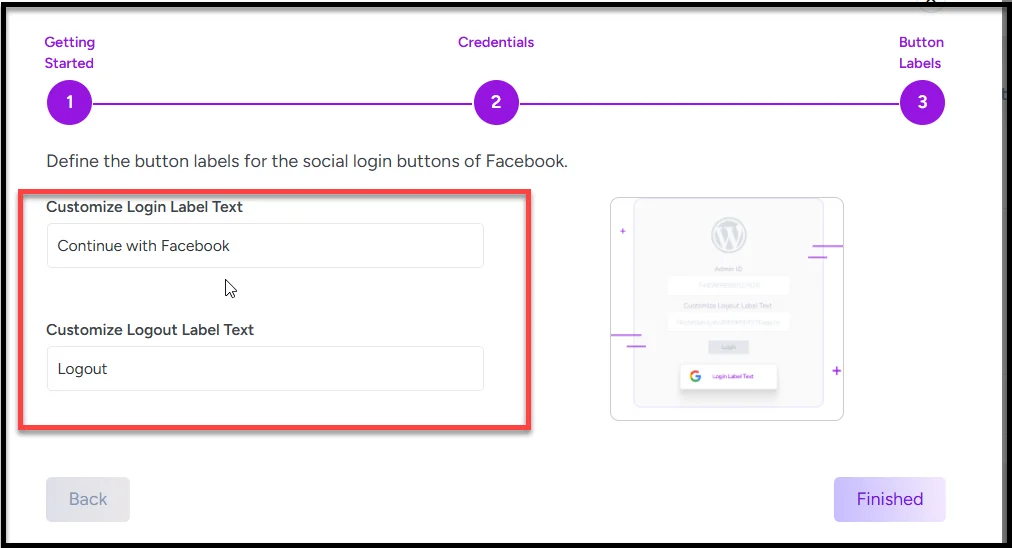
- Finally, hit the ‘Finished’ button to complete the Facebook Social Login setup process.
Step 4: Test Facebook Login on the Front-End
Now, visit your WordPress login page and click “Login with Facebook.”

A pop-up will appear asking for authorization—approve it to continue.
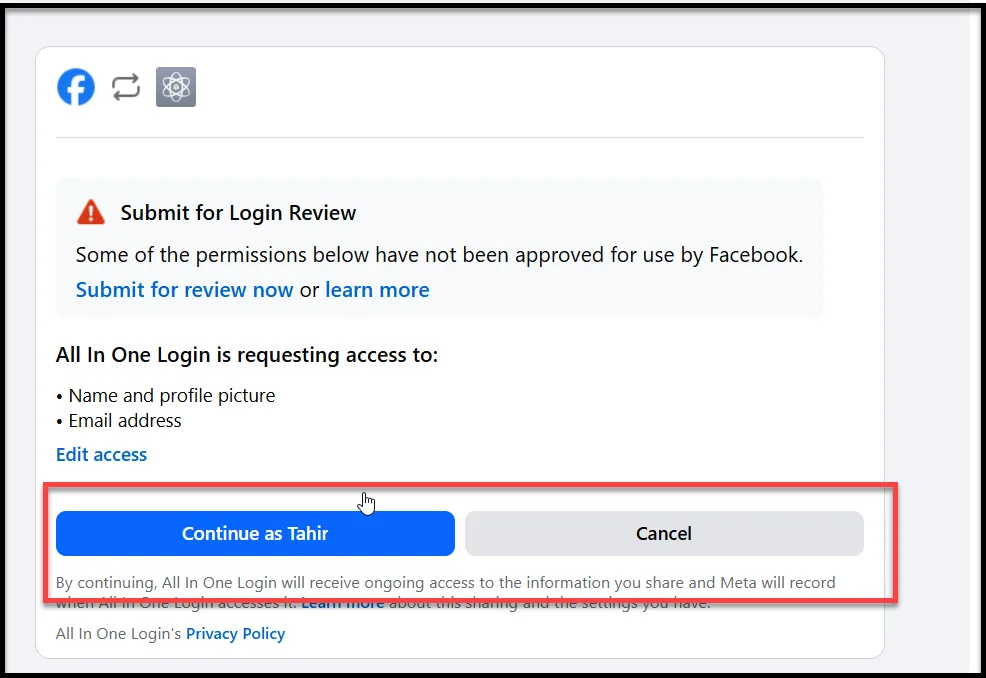
If it successfully logs you in, congratulations—your Facebook Login integration is working! 🎉
💡 Pro Tip: If the login doesn’t work, double-check your Redirect URL, App ID, and App Secret values in both Facebook and AIO Login settings.
Extra Tips to Optimize User Login Experience
Once Facebook Login is up and running, you can make your user experience even smoother with a few smart tweaks:
- Add multiple social logins: Offer users the option to log in with other social logins, such as Google, Microsoft, and LINE, alongside Facebook, to let users sign in using their preferred platform.
- Match your branding: Use AIO Login’s customization features to style your login form and social buttons so they blend perfectly with your site’s theme.
- Track user behavior: Connect analytics tools to monitor login activity, such as how many users sign in via Facebook versus other methods — valuable data for improving conversions.
- Add login buttons to more pages: Display Facebook and other social login buttons on your registration or comment forms for quicker access and better engagement.
- Add a language selector: If you have a bilingual audience, allowing login options in multiple languages can enhance UX.
💡 A well-optimized login experience not only saves time for visitors but also helps you build a loyal user base that keeps coming back.
Secure and Customize Your WordPress Login Page with All In One Login Pro
Adding Facebook Login to your WordPress site is just the start. With All In One Login Pro, you’re not only giving users a faster way to sign in — you’re also enhancing your site’s login security and experience.
Here’s what makes AIO Login Pro stand out:
- Advanced Security: Change default admin URLs, enable two-factor authentication (2FA), limit login attempts, create temporary access links, and block suspicious users or IPs.
- Multiple Social Logins: Add Facebook, Google, Microsoft, or LINE Login for one-click user authentication.
- Enhanced Protection: Enforce strong passwords, monitor failed login attempts, track lockouts, and protect your site with built-in reCAPTCHA.
- Custom Login Design: Replace the default WordPress login page with your own design — add a custom logo, background, color scheme, and layout from the Customize tab.
With all these features combined, All In One Login Pro transforms your regular WordPress login page into a secure, branded, and user-friendly entry point that builds trust and improves engagement.
👉 Ready to give your visitors a faster and safer way to log in?
Get started with All In One Login Pro today and unlock the full potential of Facebook and other social logins.
FAQs About Facebook Login Integration in WordPress
Can I use Facebook Login without a plugin?
Technically, yes—you can manually integrate Facebook Login by coding it with the Meta SDK. However, using a plugin like AIO Login Pro makes the setup much easier, faster, and more reliable. Plus, it offers customization options and built-in security that manual methods lack.
Is Facebook Login secure for WordPress sites?
Yes. Facebook Login uses OAuth 2.0, a secure authentication protocol managed by Meta, which protects user credentials and reduces the risk of password-related attacks.
Can I add multiple social logins with All In One Login Pro?
Absolutely. AIO Login Pro supports Google, Apple, Facebook, Microsoft, and LINE logins. You can enable all of them at once to give users more ways to access your site with just one click.
Do I need a business account to create a Facebook app?
No. For basic login functionality, choosing the Consumer app type is enough. You only need a business account if you plan to request additional permissions or manage business-related Meta assets.
Why is my Facebook login button not working?
The most common reasons are an incorrect or missing Redirect URL, an expired App Secret, or conflicts caused by plugin caching. Double-check your configuration in both Meta Developer settings and AIO Login’s Social Login panel to fix the issue.