
WordPress is a widely used platform, making it a prime target for cyberattacks like brute force attempts. These attacks involve bots and hackers repeatedly trying different username and password combinations to gain unauthorized access. If left unchecked, such intrusions can jeopardize your site’s security, slow down performance, and disrupt user interactions.
The good news is that you can stop the WordPress failed login attempts issue by taking a few straightforward measures to limit failed login attempts.
In this guide, we’ll explore five simple yet effective strategies to safeguard your website from these common threats.
Ready? Let’s dive in and secure your WordPress site!
Why Should You Stop WordPress Failed Login Attempts
WordPress failed login attempts are sometimes harmless, caused by users forgetting their credentials. However, frequent login failures in a short time often signal a brute-force attack, as discussed, that uses trial and error to crack login credentials.
Once inside, attackers can alter your site, abuse account privileges, or steal sensitive data. By addressing repeated failed login attempts early, you can block potential threats and protect your website from being exploited by malicious actors.
For example, you can block a user for a certain period of time after five incorrect WordPress login attempts.

Now that you know why limiting login attempts is important, let’s discuss how to implement it in WordPress.
5 Easy Ways to Stop WordPress Failed Login Attempts
Let’s check out the easiest solutions to prevent WordPress failed login attempts.
Solution #1: Implement Limit Login Attempts
Limiting login attempts in WordPress is an effective way to block hackers trying to gain unauthorized access through brute-force attacks. You can implement this feature using the All-in-One Login plugin, which offers robust WordPress login page security options.
Step #1: Install and Activate the Plugin
In your WordPress dashboard, go to Plugins > Add New Plugin and search for “All-in-One Login.” Click Install Now, then activate the plugin.

Step 2: Configure Login Attempt Limits
Navigate to the plugin settings and enable the “Limit Login Attempts” option under the Login Protection tab. Set the maximum login attempts (e.g., 3-5) and specify the lockout duration in minutes. Customize the lockout message to inform users about temporary restrictions.

Step 3: Save Settings
After configuring the options, save your changes. If you ever lock yourself out, you can disable the plugin through your site’s backend or file manager.
With this setup, your WordPress login page gains an extra layer of protection against brute-force attacks.
Solution #2: Use Google reCAPTCHA
Adding Google reCAPTCHA to your WordPress login page is a simple way to block bots from making multiple WordPress failed login attempts. This tool challenges users to verify their human identity and effectively prevents automated attacks.
Here’s how to set up Google reCAPTCHA using the All-in-One Login plugin:
Step #1: Install and Activate the Plugin
We described the installation process of the All-in-One Login plugin earlier in the article.
Step #2: Obtain reCAPTCHA Keys
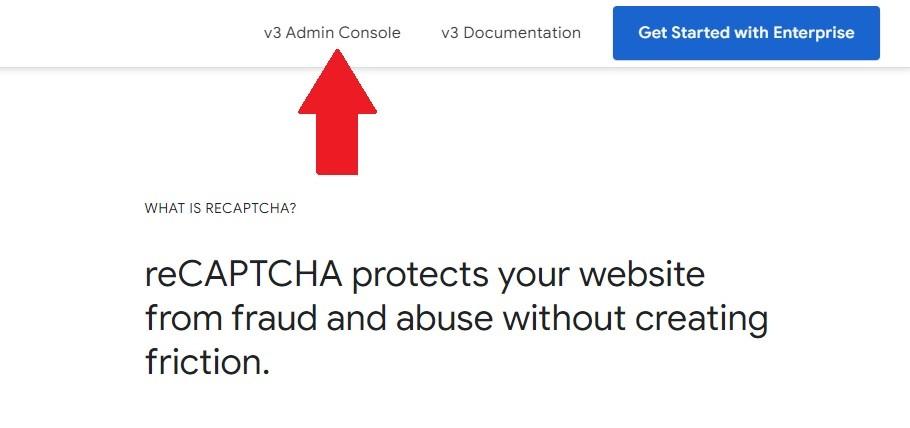
Visit the Google reCAPTCHA site, select the v3 Admin Console, and create a new reCAPTCHA project.
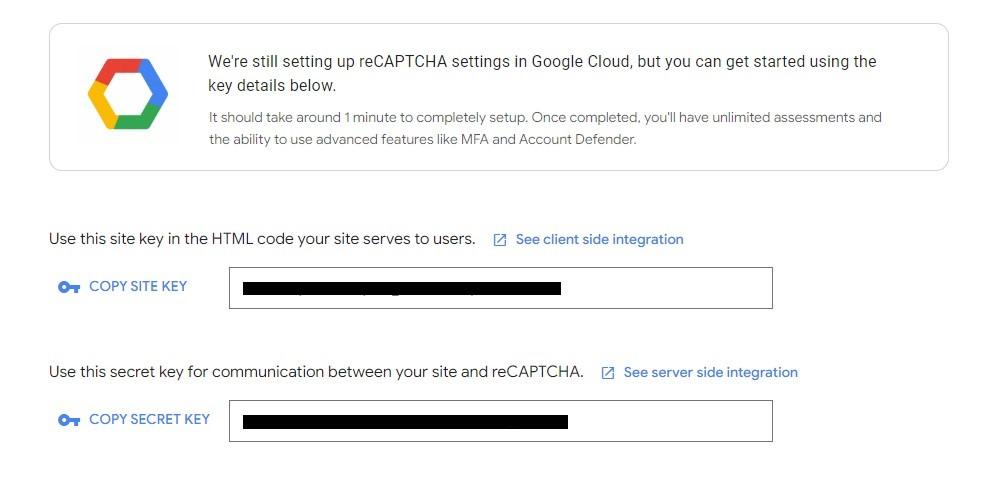
Enter your domain, choose the reCAPTCHA type (v2 or v3), and agree to the terms.

Copy the generated site and secret keys.
Step #3: Configure reCAPTCHA in WordPress
In the plugin settings, navigate to the Security tab and enable Google reCAPTCHA. Select your preferred version, paste the keys into their respective fields, and choose a theme (light or dark).
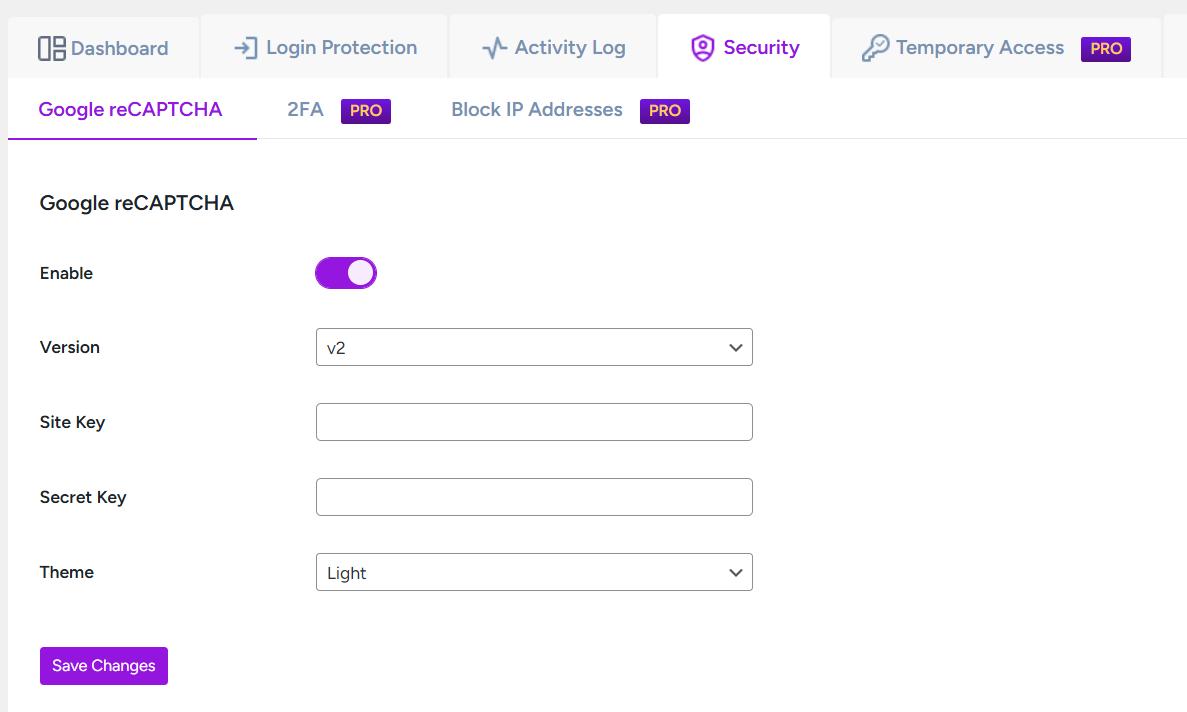
Save your changes and test the feature to confirm it works correctly.
By adding Google reCAPTCHA, you significantly enhance your login page security against automated threats.
If the reCAPTCHA is not working, please refer to this article: 04 Actionable Ways To Fix reCAPTCHA Not Working in WordPress.
Solution #3: Disable WordPress’ XML-RPC Feature
Disabling WordPress’ XML-RPC feature is an effective way to protect your site from brute-force attacks. XML-RPC allows external systems to communicate with your WordPress site, but attackers often exploit it by repeatedly sending login requests.
Here’s how you can disable this feature using the Disable XML-RPC plugin:0
Go to your WordPress admin dashboard and navigate to Plugins > Add New Plugin. Search for “Disable XML-RPC by Philip Erb,” install it, and click Activate to enable the plugin.

By disabling XML-RPC, you block one of the common attack vectors hackers use.
For additional security, consider using a solution like MalCare, Sucuri, or Wordfence, which offers advanced features like firewall logs to monitor traffic and activity logs to track user actions and detect potential threats. This layered approach strengthens your site’s defenses against unauthorized access.
Solution #4: Enforce 2FA (Two-factor Authentication)
Two-factor authentication (2FA) adds a critical layer of security to your WordPress login page by requiring both a password and a one-time passcode (OTP). Here’s how to set it up using the AIO Login plugin:
Step #1: Install and Activate the AIO Login Plugin
We described the installation process of the All-in-One Login plugin earlier in the article. Also, make sure you have the premium version of the plugin.
If you don’t have one, click here to grab the subscription plan of your choice.
After purchasing the premium version, navigate to Plugins > Add New Plugin > Upload Plugin. Click on the “Choose file” button, and select the plugin’s zip file that you have received in your email.
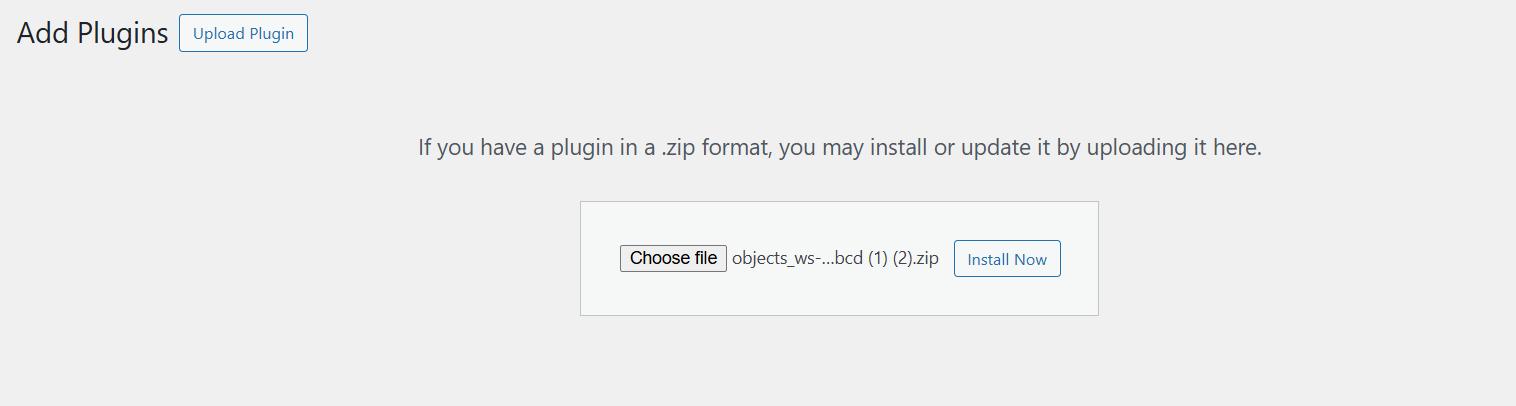
After that, click “Install Now” and then activate the plugin.
Step #2: Enable 2FA
Go to the plugin settings in your WordPress dashboard and select the Security tab. Toggle the 2FA option to activate it.

Step #3: Configure 2FA
Once enabled, a QR code will appear.
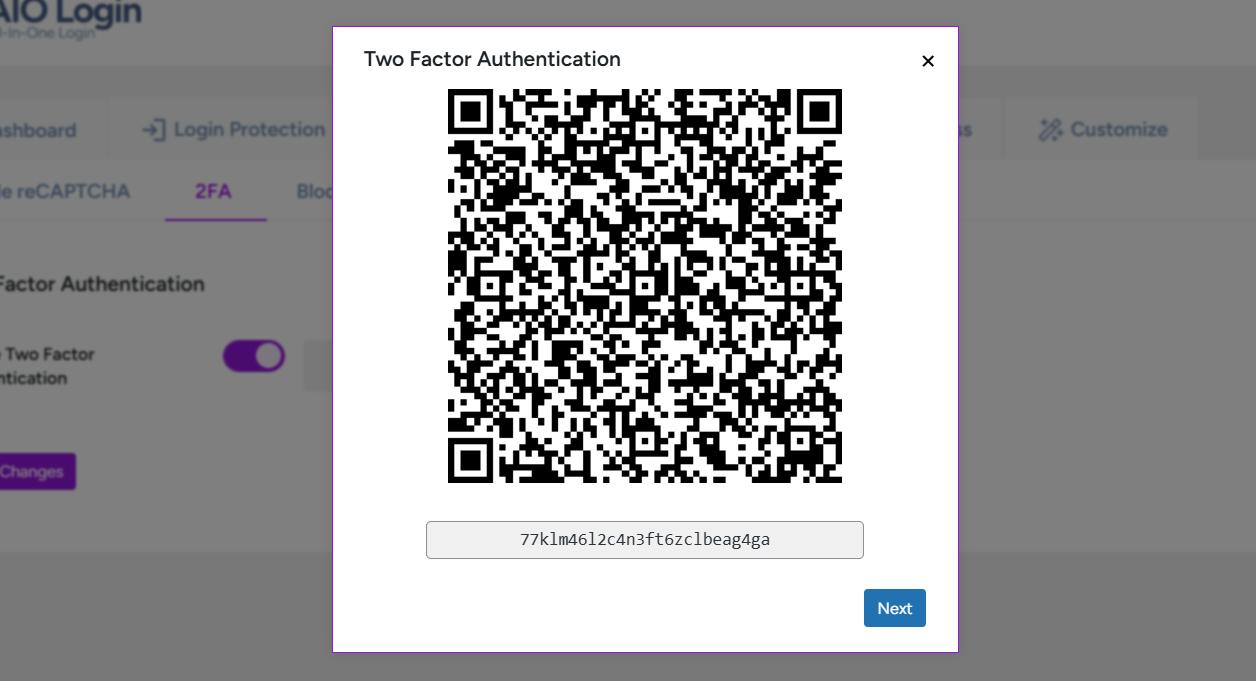
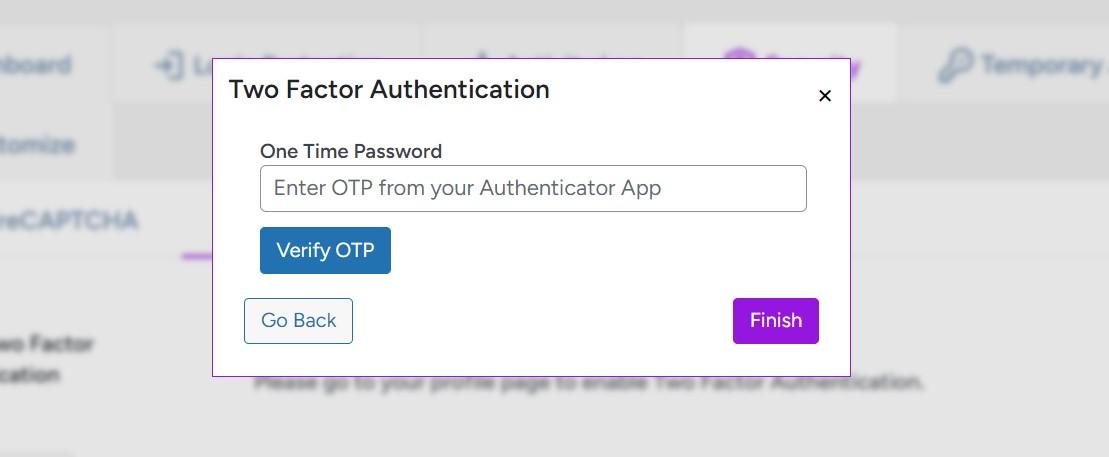
Scan this QR code on your smartphone using an authenticator app like Google Authenticator or Authy. The app will generate an OTP. Enter this OTP in the verification field and click Verify OTP.
Save your changes to complete the setup.
After enabling Two-factor authentication (2FA) for WordPress, every login attempt will require both a password and the OTP, offering robust protection against unauthorized access. For even stronger security, combine this with limiting login attempts.
Solution #5: Set Up a Firewall That Protects Against Bots
A firewall acts as a protective barrier between your website and potential cyber threats. By monitoring incoming traffic, it blocks malicious requests, including brute-force attacks, which aim to gain unauthorized access by trying various username and password combinations.
Firewalls prevent bots from overwhelming your WordPress login page with repeated login attempts. They detect suspicious patterns, block harmful IP addresses, and mitigate threats before they can harm your site.
Several WordPress security plugins offer robust web firewalls to shield your site against bots and brute-force attacks. Popular options like Wordfence, Sucuri, and iThemes Security include firewall features that enhance your site’s security and protect your login page. These tools provide a critical layer of defense against cyberattacks.
Final Remarks: WordPress Failed Login Attempts
Preventing failed login attempts is essential to safeguarding your WordPress site against brute-force attacks and unauthorized access. Taking proactive measures not only protects your website but also enhances user trust.
Key Takeaways:
- Limit login attempts to block repeated failed login attempts.
- Add Google reCAPTCHA to verify genuine users.
- Disable XML-RPC to stop bots from exploiting vulnerabilities.
- Enforce two-factor authentication for stronger login security.
- Use a web application firewall to filter and block malicious traffic.
For an all-in-one solution, consider using the AIO Login plugin. It simplifies the process of setting up these features and provides comprehensive login security to keep your WordPress site safe from threats.
Frequently Asked Questions
Does WordPress limit login attempts?
No, WordPress does not limit login attempts by default. However, you can install plugins like All In One Login or use security plugins with login protection features to enable this functionality.
How to solve the WordPress login problem?
To address WordPress login issues, follow these steps:
1. Verify your username and password.
2. Reset your password using the “Lost your password?” link.
3. Disable conflicting plugins via FTP or the hosting control panel.
4. Restore access through your hosting provider if necessary.
What causes WordPress failed login attempts?
WordPress failed login attempts occur when incorrect usernames or passwords are entered. While genuine users might forget their credentials, most failed attempts result from brute-force attacks, where bots try multiple combinations to gain unauthorized access. Preventing these attempts requires implementing strong login security measures.