Social logins are now a common choice because users prefer signing in with accounts they already use instead of remembering new passwords.
Research shows that 69%of people abandon sign-up forms when they can’t recall their credentials.
As a WordPress website owner, adding social login options helps you streamline registration, improve user experience, and increase retention.
LINE has more than 170 million monthly active users and is especially popular in Japan and Thailand. Integrating LINE Login into your WordPress site simplifies authentication and gives your users a familiar, convenient login method.
Before we show you how to add LINE Social Login to your WordPress site, let’s see why it’s so important.
Why Should You Add LINE Social Login to WordPress?
Faster Registration for Users
Social login options like LINE let users sign in with a few clicks, removing the need to type credentials. This speeds up access and reduces friction during login.
Improved User Engagement
Providing multiple login choices increases the chance that users will complete registration. LINE users are especially likely to sign in when they can use their existing credentials, improving engagement.
Reduced Abandoned Signups
Long forms and new account requirements often cause users to abandon signups. With LINE login, you offer a faster, more convenient option that reduces abandoned registrations
4 Easy Steps to Integrate LINE Social Login in WordPress
In this guide, we’ll walk you through the complete process of adding LINE social login to your WordPress site. Whether you want to improve engagement, reduce abandoned signups, or offer a faster login option, LINE Login makes it easy.
Step 1: Install All In One Login (Free + Pro)
We are using All In One Login because it allows you to secure and customize the WordPress login page without writing a single line of code, and it’s one of the best Social Login plugins for WordPress.
Installing the Free Version:
- Log in to your WordPress Dashboard.
- Go to Plugins → Add Plugin.
- Search for “All In One Login” by Saad Iqbal.
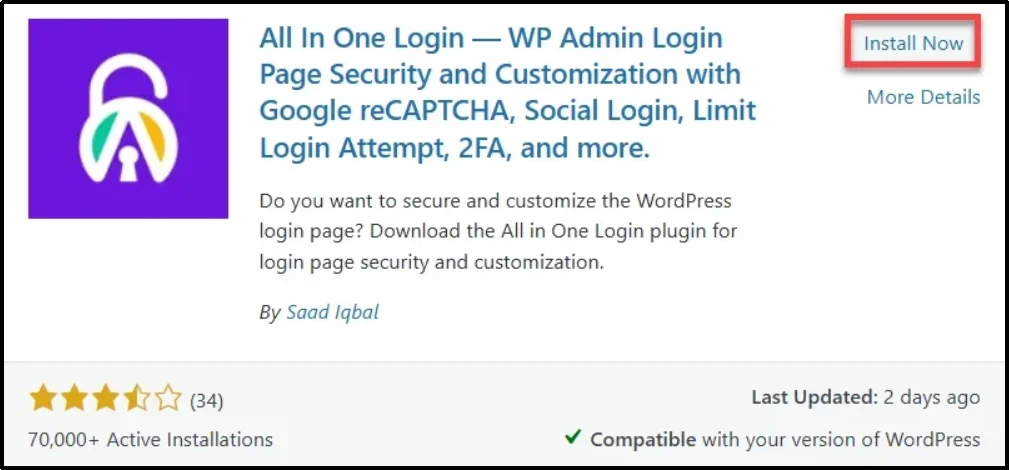
- Click Install Now, then Activate.
- After activation, the plugin’s free version is successfully installed.
Enabling Premium Features:
To unlock premium features such as LINE Login and additional social login options:
- Visit the plugin’s official website and select a premium plan.
- After purchasing, you’ll receive a welcome email containing:
- A ZIP file with the premium plugin.
- Your license key.
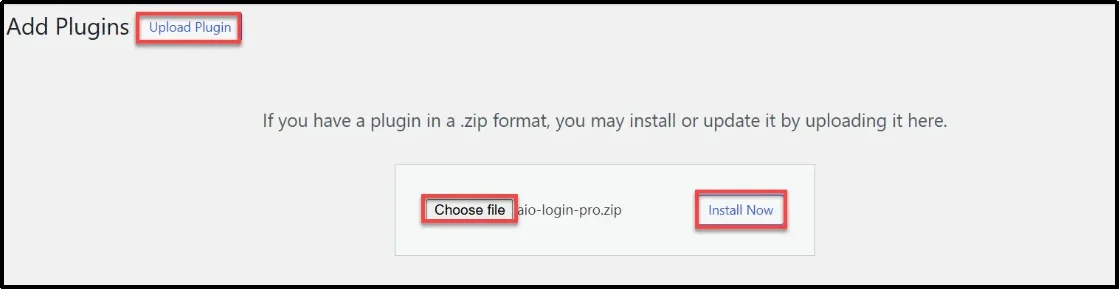
Installing the Premium Version:
- Download the ZIP file from the email.
- In your WordPress dashboard, navigate to Plugins → Add Plugin → Upload Plugin.
- Upload the ZIP file and click Install Now.
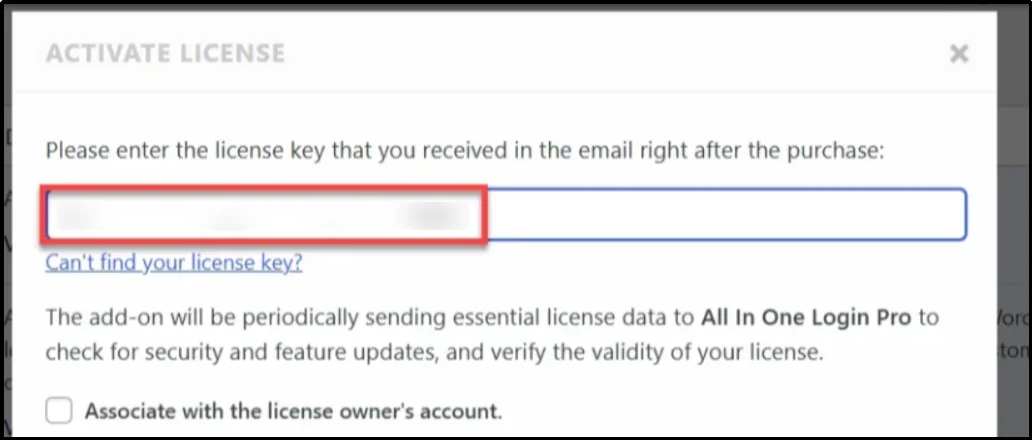
- After installation, click Activate Plugin. When prompted, enter your license key. Copy it from the email, paste it into the field, and click Agree & Activate License.
Accessing Social Login Options:
After activation, go to All In One Login → Social Login and enable options such as Facebook, Google, Microsoft, and LINE.
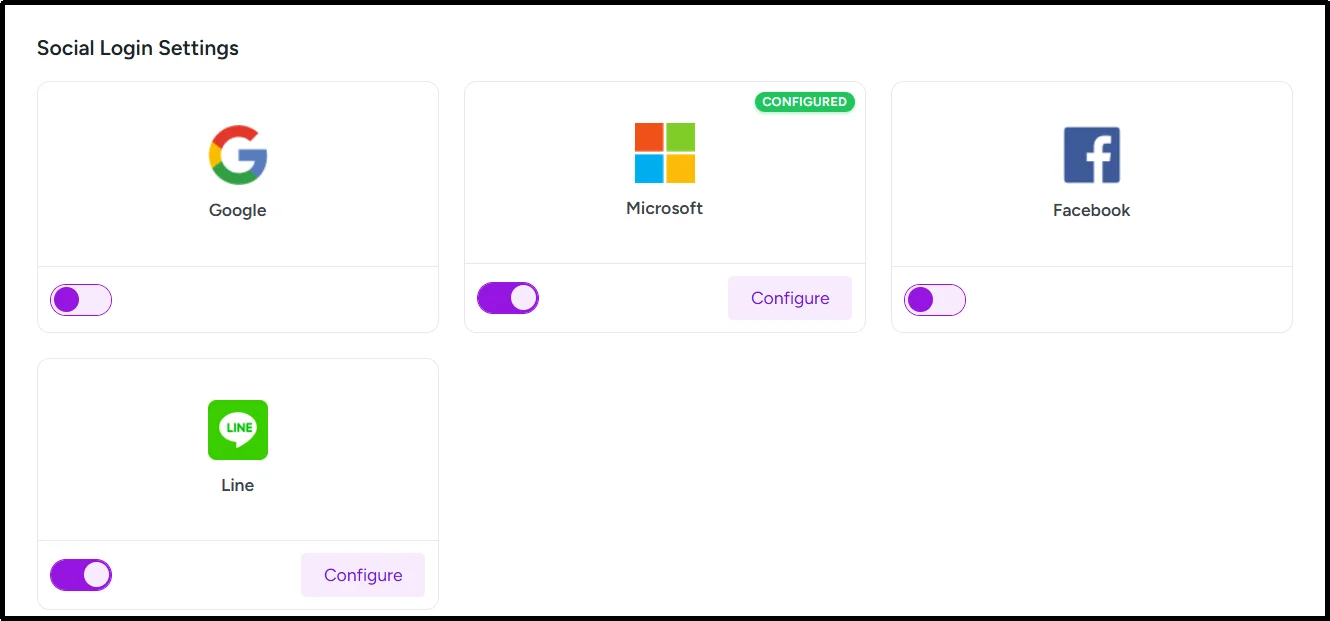
Step 2: Enable LINE Login in All In One Login
- Navigate to WordPress Dashboard → All In One Login → Social Login.
- Toggle LINE to ON, then click Configure.
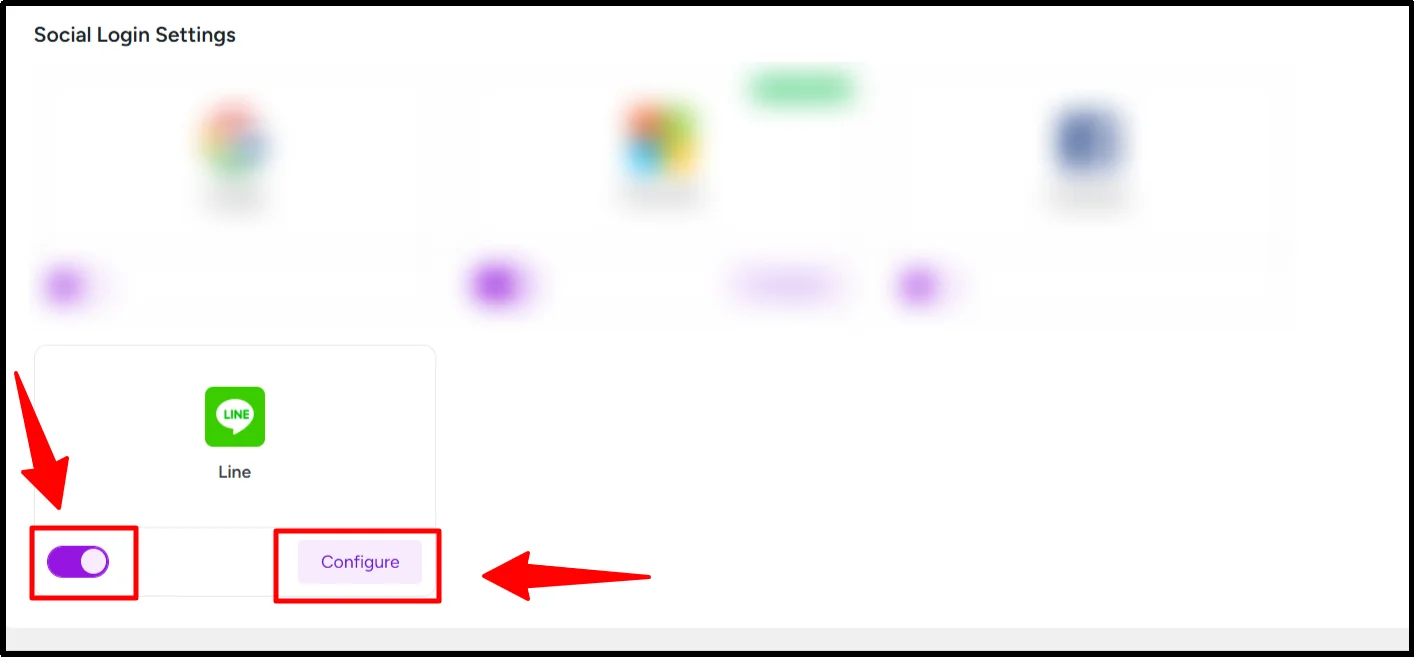
- A pop-up will appear. Copy the Redirect URL shown, as you’ll need it to create your LINE Provider.
- Click Next.
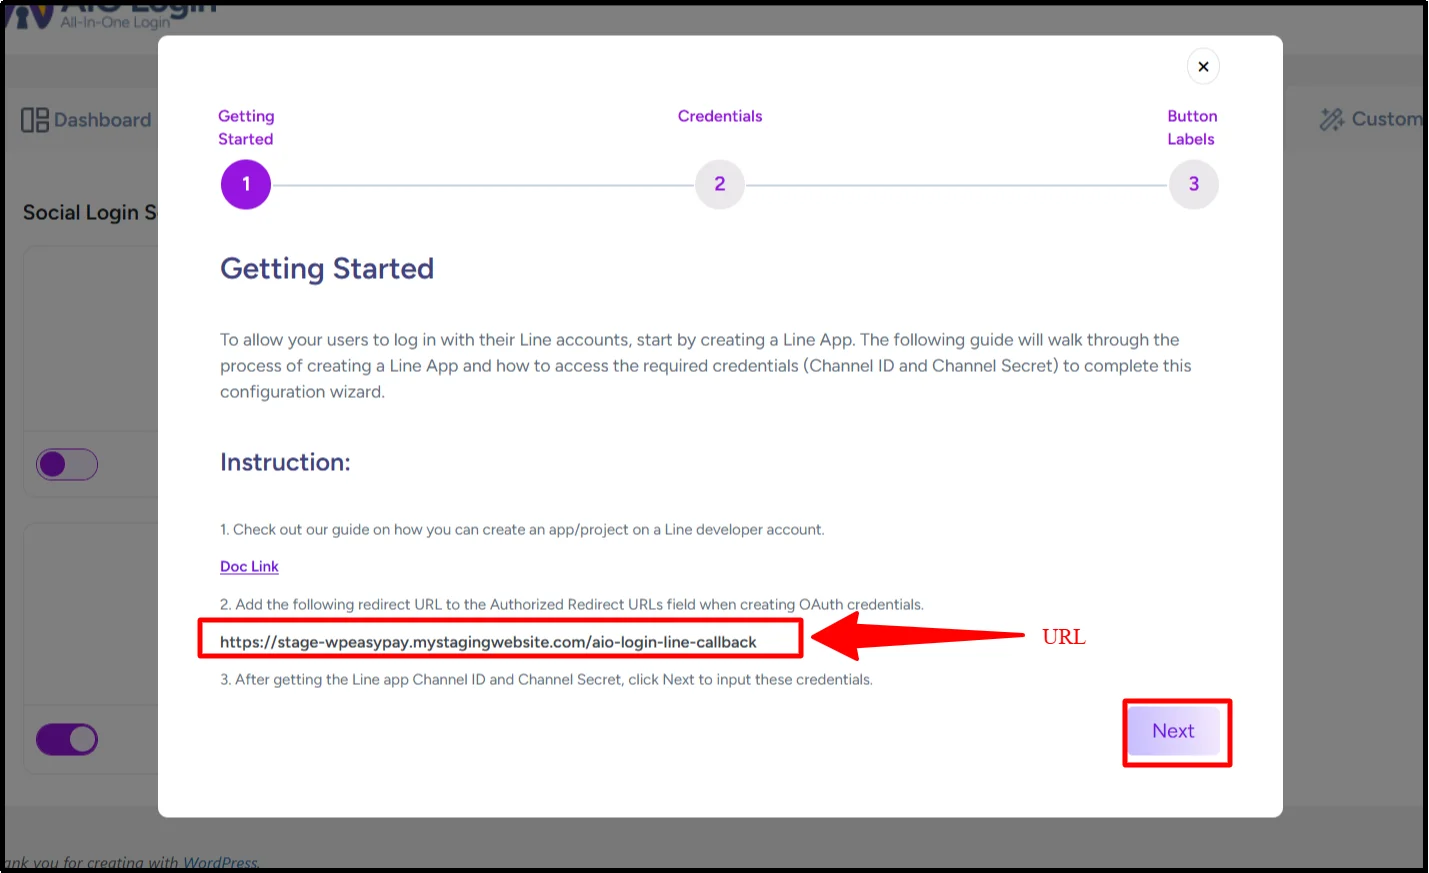
- Keep this page open, as you’ll return to it shortly.
Step 3: Create a New LINE Provider
- Log in to your LINE Business Account. If you don’t have one yet, create it first.
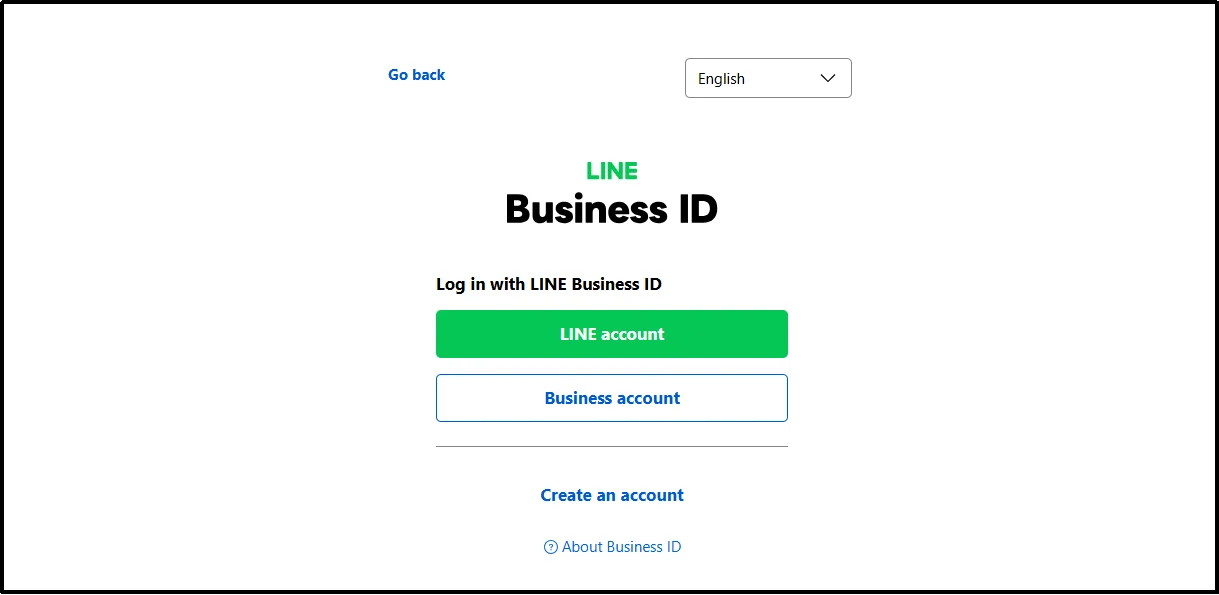
- Create a New LINE Provider. In the left menu, click Providers. When the page opens, select ‘Create a New Provider.’
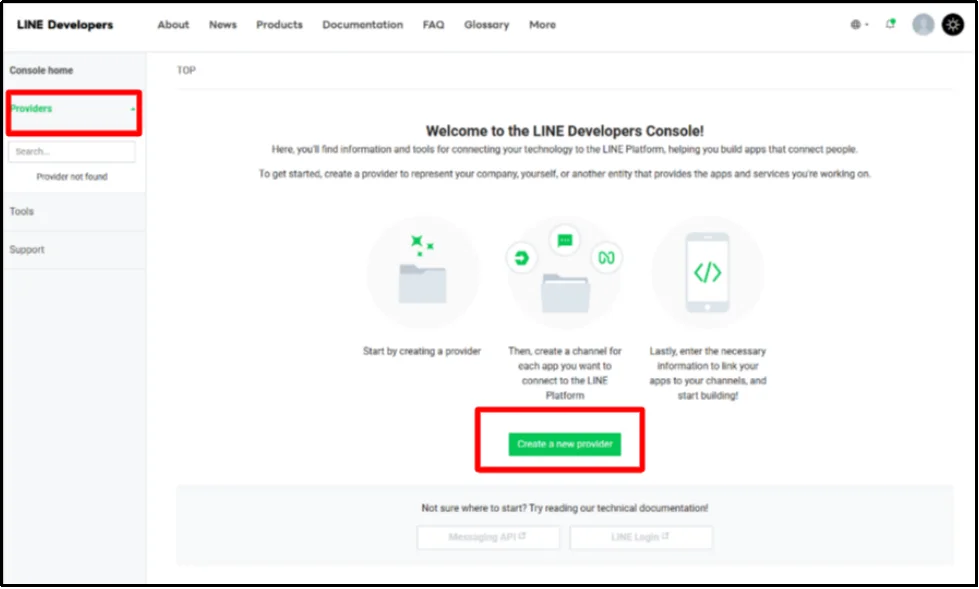
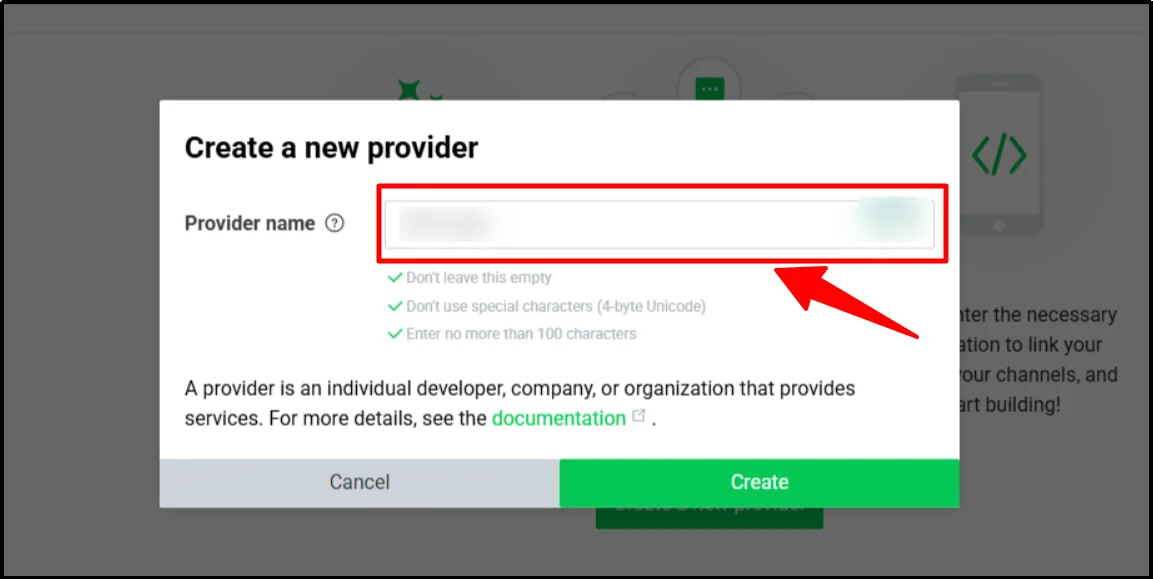
- A pop-up will appear. Enter a name for your provider and click Create
- Next, set up your LINE channel. Under your provider, click Create a LINE Login Channel.
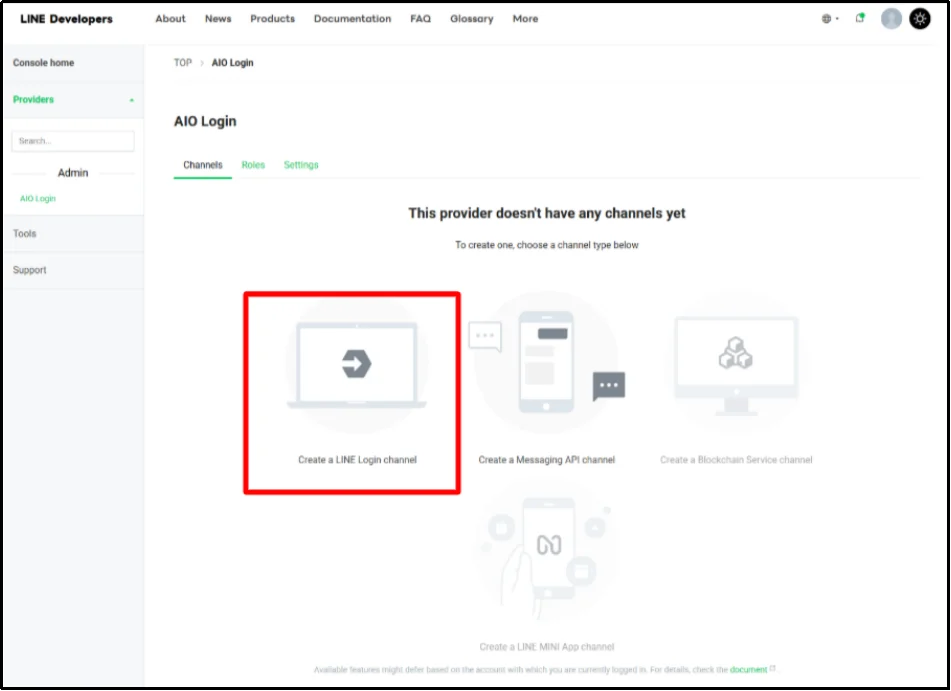
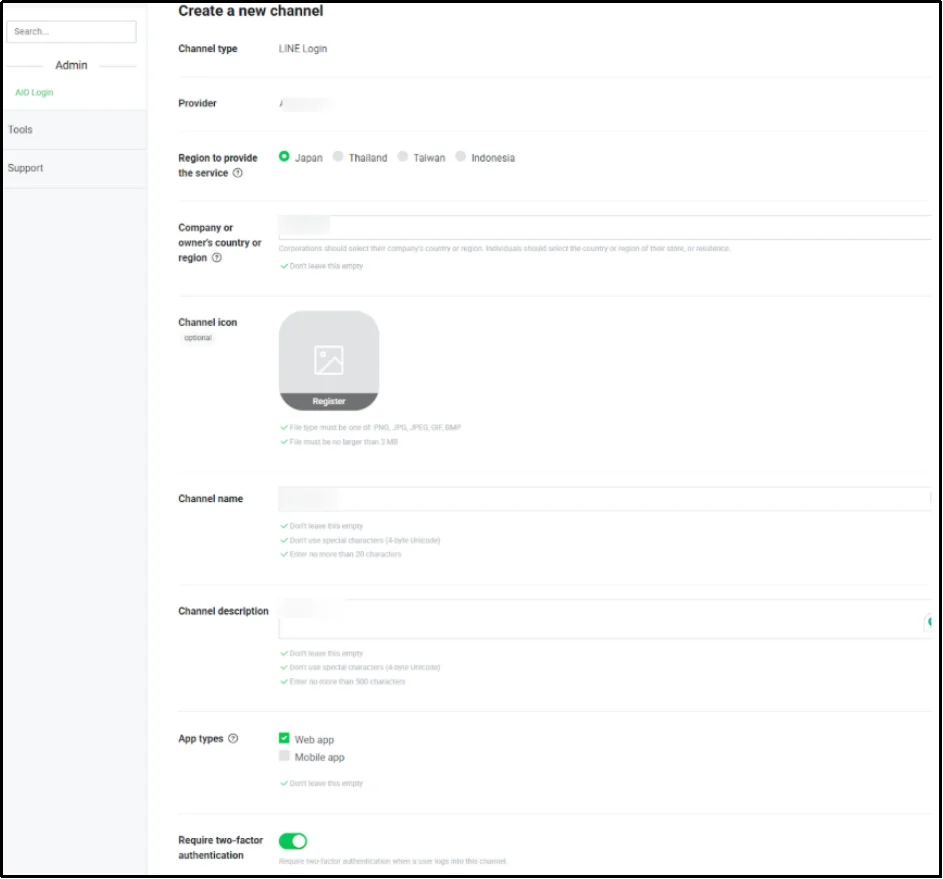
- A new tab will open. Fill in the required information.
- Channel Type: Choose LINE Login as the channel type.
- Region: Ensure that LINE integration is available in your selected region.
- Company/Owner’s Country: Select the appropriate country for your company or account.
- Channel Icon: Upload an icon for your channel (this is optional).
- Channel Name and Description: Enter a name for your channel and provide a brief description of it.
- App Type: Choose whether your app is for the Web or Mobile.
- Two-Factor Authentication (2FA): Enable 2FA to improve security during login.
- After filling in all the necessary information, accept the LINE Developer’s Agreement and click Create.
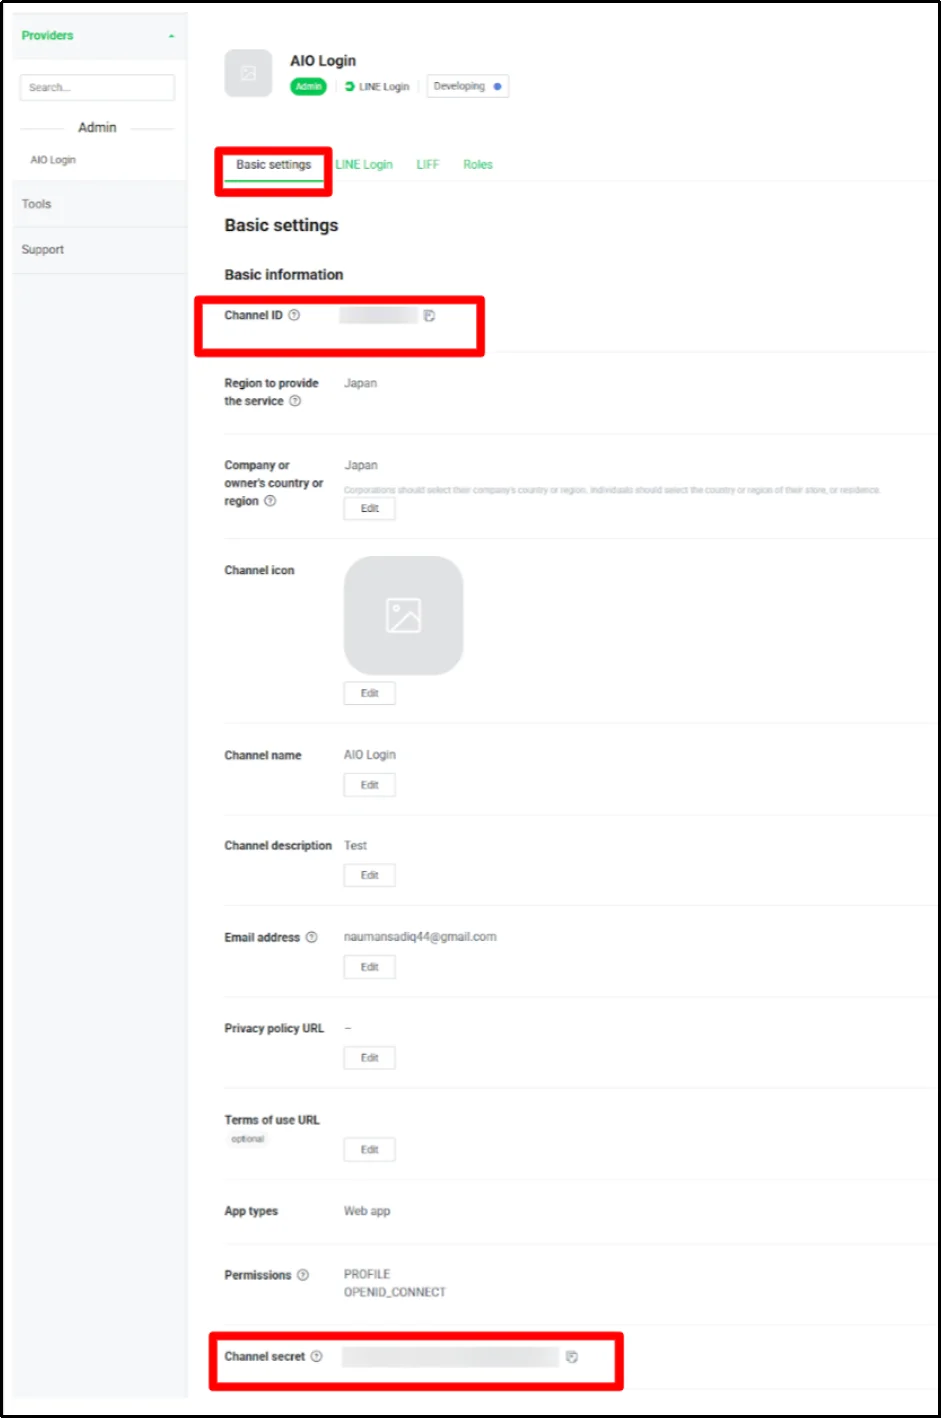
- Once the channel is successfully created, you will see the Channel ID and Channel Secret displayed on the screen. These credentials are essential for integrating the LINE login with your WordPress site.
- Navigate to the second tab labeled ‘LINE Login’ in the developer console. In the Callback URL field, paste the Redirect URL that you’ve copied from the All In One Login’s LINE Social Login setup screen. (Generated in step 2).
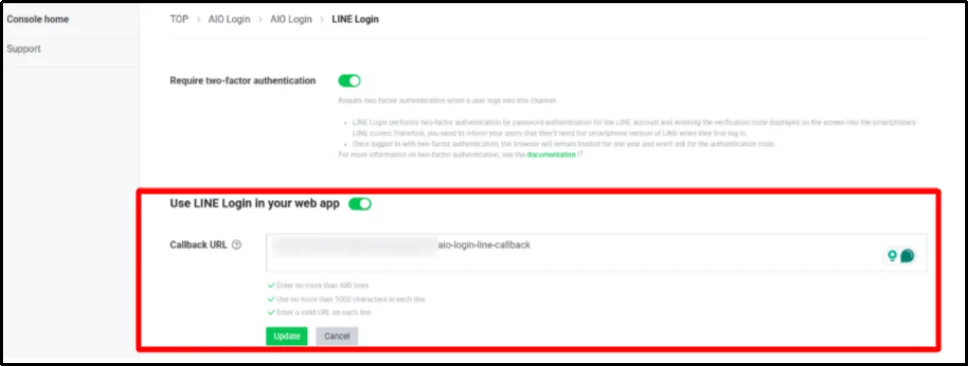
- After entering all details, click Update to save your settings. Your LINE login integration is now ready for use with your WordPress site.
Step 4: Finalize the Setup in All In One Login
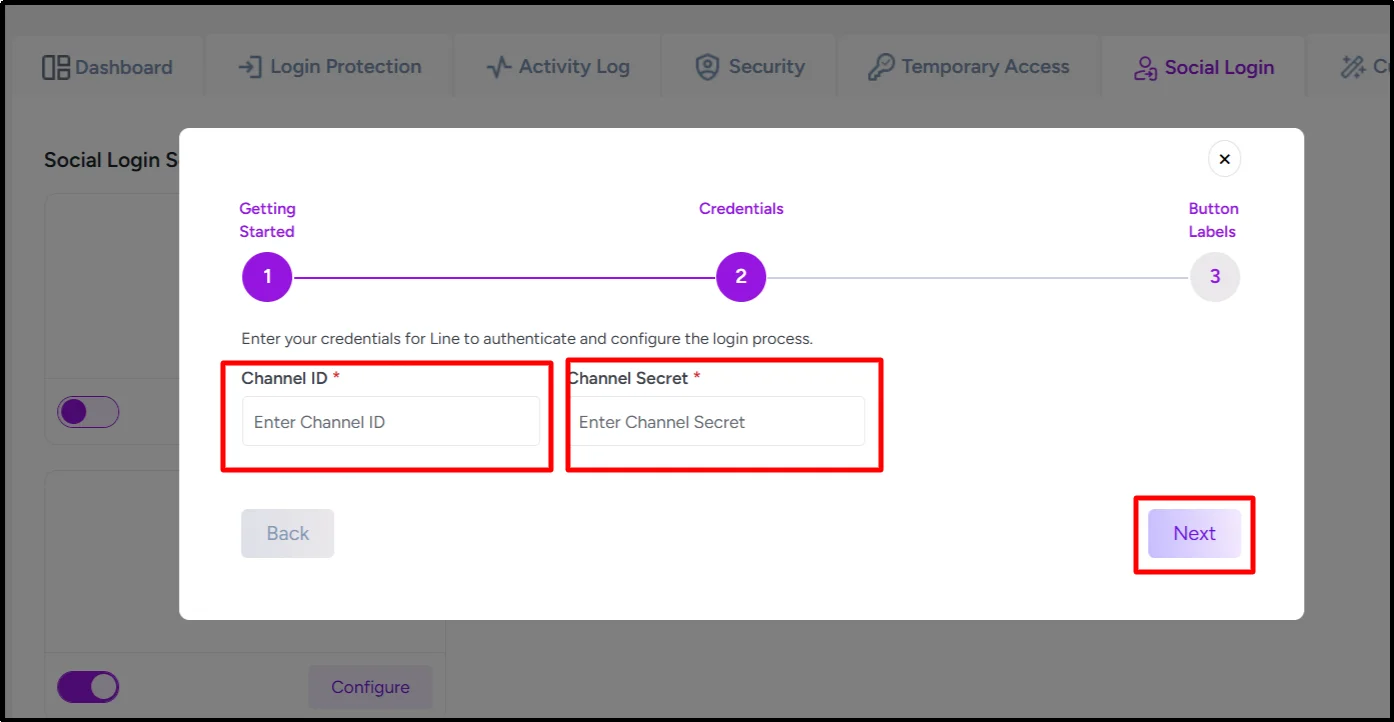
1. Go back to the All In One Login → LINE Configuration pop-up.
2. Paste your Channel ID and Channel Secret into the respective fields.
3. Click Next to proceed.
4. Adjust the Login Label Text and Logout Label Text to match your site’s design and messaging.
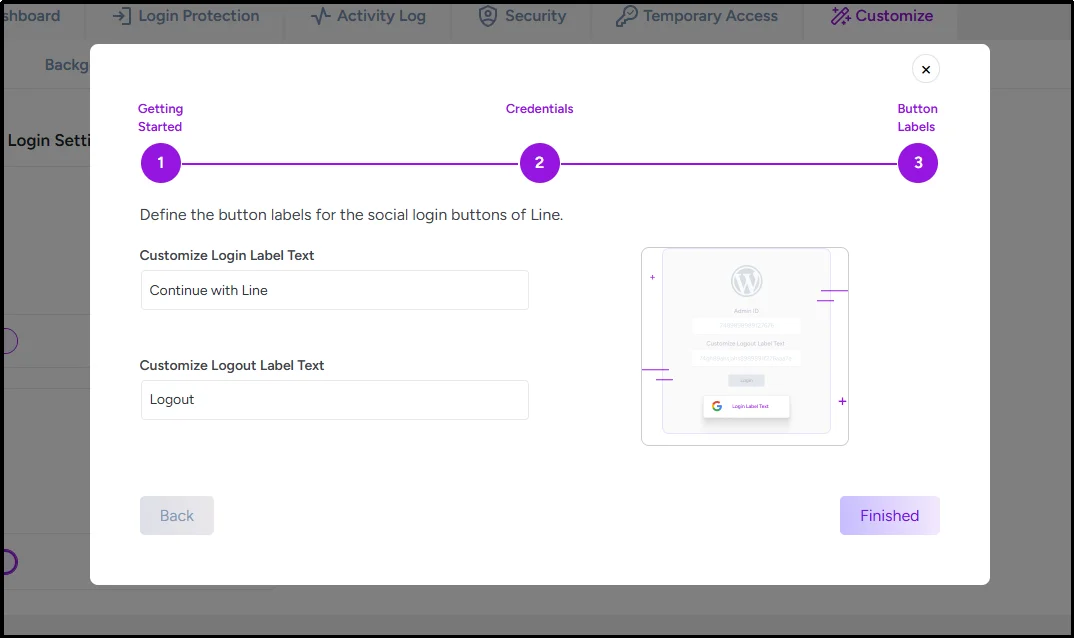
5. Click Finished to save the setup.
Your LINE Social Login button is now active and will appear on your login page or anywhere All In One Login is enabled on your site.
Verify the LINE Login Integration
After completing the setup, follow these steps to confirm that the LINE Login integration is working correctly:
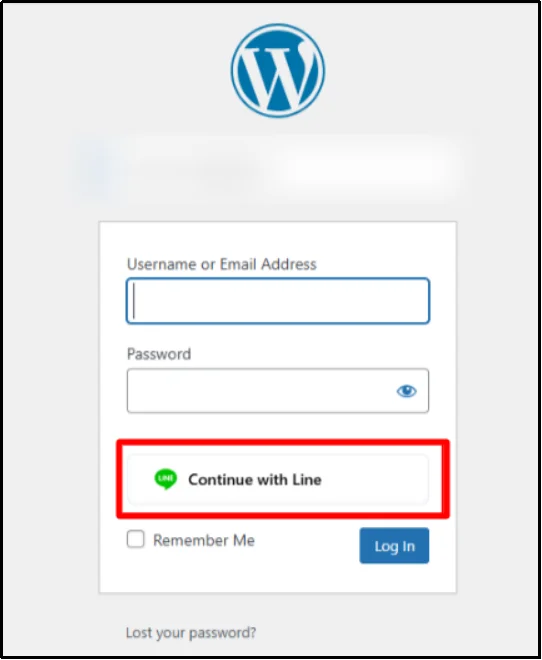
Check the WordPress Login Page:
1. Go to your WordPress login page.
2. The LINE Login button should now appear.
Check the Social Login Tab in All In One Login Settings:
- In the All In One Login settings, navigate to the Social Login tab.
- Look for the green “Configured” badge next to the LINE tab. This indicates that the LINE Login has been successfully integrated.
Once both these steps are verified, you have successfully configured LINE Social Login with your WordPress site!
Troubleshooting Common Problems with LINE Social Login
Running into issues with your LINE Social Login? Here’s a quick guide to troubleshoot and get everything back on track!
1. Invalid Redirect URI
Issue: The redirect URI in the LINE Developer Console doesn’t align with the one on your WordPress site.
Solution: Double-check that the Callback URL in both your WordPress settings and LINE Developer Console is identical, including the correct protocol (https://). Even a small mismatch can cause issues!
2. Login Not Working
Issue: Users can’t log in with LINE credentials.
Solution: Verify your Channel ID and Channel Secret. Make sure 2FA is enabled in the LINE Developer Console. Clear your browser cache and test again.
3. Profile Data Missing
Issue: Missing profile information, like name or email, after login.
Solution: Ensure the proper permissions and scopes are enabled in the LINE Developer Console to access user profile data. Clear any caching plugins that may interfere with profile data retrieval.
4. Plugin Conflicts
Issue: Other plugins conflict with LINE Social Login.
Solution: Disable all plugins except All In One Login, then reactivate them one by one to find the conflict. Make sure every plugin is updated.
5. Caching Issues
Issue: Caching can interfere with the display of the login button or the retrieval of user data.
Solution: Clear both your browser cache and server-side cache. To avoid conflicts, exclude login pages from caching or temporarily disable any caching plugins to test if that resolves the issue.
Wrapping up
Providing an easy, secure login experience is crucial for keeping users engaged and reducing drop-offs on your site. Social logins, like LINE Login, offer a fast, hassle-free way for users to sign in without needing to remember passwords, enhancing both user experience and retention.
All In One Login is the perfect plugin to integrate LINE Login and other social login options into your WordPress site with ease. Its intuitive setup and powerful features let you offer one-click logins, reducing friction and increasing conversions.
Don’t have coding skills? No problem! All In One Login handles the WordPress social login setup for you. You can focus on growing your site while offering users a fast, secure login experience.
Don’t let the complicated WordPress login process hold your users back. Get All In One Login today and give your audience a faster, smoother login experience.
Frequently Asked Questions (FAQs)
Can I use LINE Login without HTTPS?
No, LINE Login requires HTTPS for security reasons. You must use a secure connection (HTTPS) for the integration to work properly.
Will LINE Login create new WordPress user accounts automatically?
Yes, when a user logs in via LINE for the first time, a new WordPress user account will be created automatically based on the information provided by LINE (e.g., name, email).
Can I collect email addresses via LINE Login?
You can collect users’ email addresses via LINE Login, provided you have the necessary permissions in your LINE Developer Console. Make sure to enable the email scope for user authentication.
Is LINE Web Login free to use?
Yes, LINE Web Login is free to use. However, if you want more social login options in WordPress, you’ll need a premium plan of the All In One Login plugin.
What are the alternatives to LINE Web Login?
If you’re looking for alternatives to LINE Login, popular options include Google Login, Facebook Login, and Microsoft Login, all of which are supported by the All In One Login plugin. These can provide users with more login options tailored to their preferences.